You’re choosing between two top home security systems, and the first question is how each handles real alarms and daily use. This intro lays out what matters: who answers your alerts, how loud and reliable the siren and hub are, and whether the system stays online during outages.
Frontpoint centers its control on a keypad plus a separate hub with a 104.5 dB siren, 24-hour battery backup, and both cellular and Wi‑Fi links for redundancy. It supports many sensors and smart platforms like Z‑Wave, Alexa, and Google Assistant.
SafeHome and Consumer Reports also flag pricing and service differences that affect real-world value. Monthly monitoring fees, installation choices, and tech support shape which solution fits your home and budget.
Read on to see which package matches your priorities, from louder alarms and backup power to flexible equipment and clear costs.
At-a-Glance: Which home security system fits your needs in the United States
Use this quick guide to match a home security setup to your budget and lifestyle.
SafeHome lists ADT, SimpliSafe, Vivint, Cove, and Frontpoint among top home picks for new construction. That same source notes custom packages, DIY or pro installation, and different monitoring tiers.
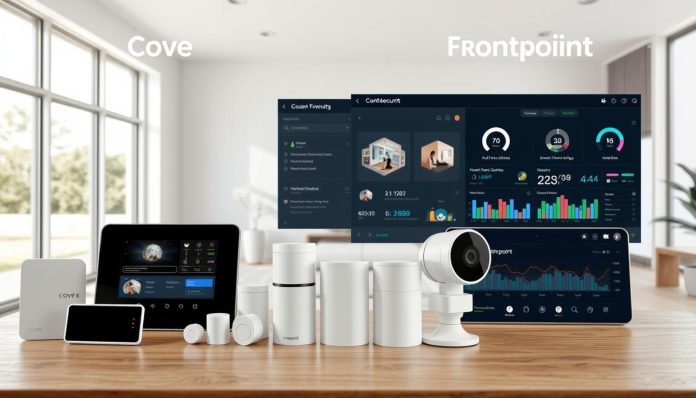
Cost matters. Cove starts equipment near $99 with monthly monitoring from $19.99. Frontpoint-style packages begin lower for some kits and show monitoring around $24.99–$49.99 depending on the plan.
| Feature | Starter Equipment | Monthly Monitoring | Best For |
|---|---|---|---|
| Option A | $69–$129 | $24.99–$49.99 | DIY setup, keypad users |
| Option B | $99+ | $19.99+ | Budget-conscious, app-first |
| Trusted Picks | Varied packages | $19.99–$49.99 | New builds and upgrades |
- Quick snapshot of setup paths and monitoring tiers to shape your shortlist.
- Compare starter price and ongoing monthly monitoring to estimate lifetime cost.
- Check reviews and expert rankings to confirm real-world performance before you buy.
Cove vs Frontpoint: Depth of Monitoring, Hardware Quality, & Privacy
Compare how each provider keeps you connected during an alarm and what that means for real-world response times.
You should assess connection redundancy first. Look for simultaneous cellular and Wi‑Fi links and Crash & Smash protections that keep signals flowing when the panel is tampered with.
Next, weigh monthly monitoring costs reported in recent reviews and listings. Promotions and plan tiers create wide price ranges, so match promised coverage to actual fees before you commit.
Equipment matters. Focus on siren output, 24‑hour backup power, and how many devices the hub can support as your home grows. Also confirm life‑safety sensors—smoke, heat, and CO—are included or supported.
Finally, consider control panel and app reliability. A smooth arm/disarm workflow, clear alerts, and prompt tech support drive everyday trust in your security system.

| Factor | What to check | Why it matters |
|---|---|---|
| Connection | Cellular + Wi‑Fi, Crash & Smash | Faster, more reliable alerts |
| Equipment | Siren, backup battery, max sensors | Coverage and uptime |
| Costs & reviews | Monthly monitoring, support ratings | Value and long‑term satisfaction |
Hardware quality and control experience: keypad, hub, and panel differences
Compare how a simple keypad plus a separate hub stacks up against a full touchscreen control setup for everyday use.
The standard keypad is basic and fast for arming and disarming. It pairs with a hub that includes a 104.5 dB siren, 24-hour battery backup, and dual-path cellular and Wi‑Fi links. That hub supports Crash & Smash protection and up to 80 sensors, including smoke/heat and carbon monoxide detectors.
Consider whether the optional touchscreen panel—about $105—is worth the upgrade. A touchscreen adds visual controls and easier status checks. The simpler alarm panel, though, can be more reliable and quicker for routine use.
- You can add many door window sensors, motion detectors, and other security devices to grow with your floor plan.
- Doorbell camera and Z‑Wave integrations are supported, so video and sensors work through the same control panel and app.
- Durability, wireless range, and fast recovery after outages matter more than looks when choosing equipment.

| Component | Key feature | Why it matters |
|---|---|---|
| Keypad | Quick arm/disarm | Faster daily use |
| Hub | Dual-path, siren, battery | Uptime and alarm delivery |
| Touchscreen panel | Visual controls | Better for video and advanced users (vivint smart style) |
Smart home, automation, and app control
Mixing app control with voice assistants makes automations simpler and more useful for daily life.
Frontpoint works with Z‑Wave accessories and supports Amazon Alexa and Google Assistant so you can build scenes, schedules, and simple routines. The keypad-plus-hub design pairs with a mobile app for fast arm/disarm and remote checks. Other vendors, like Vivint Smart, emphasize a central touchscreen for deeper in-home control.
Decide whether you want an app-first flow or a wall-mounted panel. Check that smart home devices pair smoothly so lights, locks, thermostats, and a doorbell camera trigger reliably. Also confirm you can add parts later; the right system also offers incremental upgrades without a full swap.

- Confirm voice control via Amazon Alexa and set practical routines.
- Test doorbell camera alerts to trigger lights or announcements.
- Map automations like arming schedules and geofencing to cut daily steps.
| Feature | Benefit | Best for |
|---|---|---|
| Z‑Wave & voice | Works with many devices, good for scenes | Users who want broad smart home control |
| App-first control | Fast remote access, simpler setup | People who live on mobile |
| Touchscreen hub | Centralized control, visual status | Homes that prefer an in-room command center |
Pick the approach that matches how you live. Good automation boosts convenience without weakening security, and a clear plan for growth keeps your smart home running smoothly.
Installation, DIY complexity, and ongoing support
Deciding whether to install your own security gear or hire a pro affects cost, timeline, and peace of mind.
You can pick DIY installation or pay for a technician visit. Professional setup fees typically start around $99–$129, while many basic kits finish in under an hour when you do an easy diy installation yourself.

Think about the work: mounting sensors, pairing a keypad and hub, and configuring alerts. If you are comfortable with tools and a step‑by‑step app, DIY saves money. If you prefer hands‑off service, the pro option simplifies timing and placement.
- Confirm support channels: customer phone help, in‑app setup wizards, and written guides.
- Plan sensor placement near doors, busy hallways, garages, and basements to cut false alarms and boost range.
- Check return windows, satisfaction guarantees, and how firmware updates roll out so the system stays current.
| Install option | Typical time | Why it matters |
|---|---|---|
| DIY | 30–60 minutes (basic kit) | Lower cost, control over placement |
| Professional | 1–2 hours | Hassle‑free, expert placement, fee applies |
| Support | Phone & app | Helps with setup, troubleshooting, and updates |
Expect varied tech support quality across brands; Consumer Reports notes that support affects long‑term satisfaction. Before you buy, confirm the installation option and support mix that suit your home and daily routine.
Pricing clarity: upfront cost, monthly monitoring, and total cost of ownership
Start by separating one‑time equipment fees from the ongoing charges you’ll pay each month.
Compare package price and what the system actually includes. Some starter kits list equipment near $69–$129, while other packages begin around $99 with monitoring from $19.99 per month. Promotional offers shift the headline price, so read the fine print on what sensors and security equipment come bundled.
Factor recurring monitoring into your year‑one math. Monthly monitoring can range from about $19.99 up to $49.99 depending on plan features. Add professional installation—often $99–$129—if you prefer in‑home setup, or choose DIY to cut upfront cost.
- Model total cost: upfront equipment + first year monitoring + install fees.
- Check per‑sensor pricing and whether cameras or extra sensors are bundled or sold separately.
- Watch for contract terms, cancellation fees, and financing that can affect long‑term cost.
| Item | Typical range | Why it matters |
|---|---|---|
| Upfront equipment | $69–$129+ | Sets first‑month spend and hardware included |
| Monthly monitoring | $19.99–$49.99 | Drives annual cost and service level |
| Install (pro) | $99–$129 | One‑time fee for expert placement |
Run the numbers both for the first year and for multi‑year ownership. For example, doubling monthly monitoring or adding cameras can push a basic path toward totals like 392.40 or 797.88 over time. That clarity helps you pick the package that matches your budget and expected growth.
Privacy, data practices, and alerts you can trust
Clear data policies and fast alerts shape whether you trust a system to protect your home.
Look first at how clearly a company explains what it collects and why. You want simple terms that say what data is stored, where it is kept, and who can see it. That transparency builds trust when alerts arrive on your phone or app.
Next, test alert quality. Timely, actionable notifications reduce false alarms and speed response. You should be able to adjust sensitivity and follow escalation paths so door window alerts and entry delays match your daily routine.
- Verify life‑safety coverage: reliable smoke heat and carbon monoxide sensors must trigger without delay.
- Confirm hardware safeguards: Crash & Smash protection, dual‑path connectivity, and backup power keep the hub and panel working under attack.
- Check privacy controls: camera shutter options, recording limits by mode, and granular user permissions protect family data.
- Assess support: fast, knowledgeable help improves confidence when alarms or devices misbehave.
| Area | What to check | Why it matters | Suggested action |
|---|---|---|---|
| Data practices | Retention, sharing, encryption | Controls who views recordings and logs | Read the privacy policy and set permissions |
| Alert reliability | App push, phone calls, escalation | Gets you the right info fast | Simulate alarms and check notification paths |
| Hardware safeguards | Crash & Smash, dual‑path, battery | Prevents signal loss if keypad, panel, or hub is damaged | Confirm features and test failover regularly |
Conclusion
Make your final pick by matching features to how you live and what you’ll actually use.
Choose a home security path that balances upfront cost, installation approach, and the equipment you need today. If you want strong redundancy, a loud siren, and broad sensor support, prioritize that profile. If lower entry price and flexible packages matter more, lean toward budget‑friendly options.
Test app controls, keypad workflows, and alarm panel alerts before you finalize. Add door window sensors and a doorbell camera where they help most. Compare current promotions and lock in a monitoring plan that fits your timeline and growth plans for smart home automation, Amazon Alexa, or Google Home integration.

