Keeping your computer safe is key in today’s world. Knowing how to set up your BIOS/UEFI settings and turning on Secure Boot is important. These steps help guard your system against malware and unwanted access.
To get to these settings, you need to restart your computer. Then, go to Settings > Update & Security > Recovery and click Restart now under Advanced startup. Inside, you can tweak your Secure Boot and other security options to boost your system’s safety.
Key Takeaways
- Understanding BIOS/UEFI settings is crucial for home users.
- Enabling Secure Boot enhances system security.
- Accessing BIOS/UEFI settings requires restarting your computer.
- Proper configuration protects against malware and unauthorized access.
- Cybersecurity is a critical concern for home users.
Understanding Secure Boot and UEFI
To keep your computer safe and running well, you need to know about Secure Boot and UEFI. These tools help guard your system from bad software and make it work smoothly.
What is Secure Boot?
Secure Boot is a feature that makes sure your computer only boots with trusted software. It checks the digital signature of the bootloader and other parts before they start. This stops bad software from getting in, making your system safer.
Importance of Secure Boot
Secure Boot is key because it keeps your computer safe from malware like rootkits and bootkits. These are hard to find and remove. Secure Boot lets only approved software run, cutting down the risk of infection. This is very important today, as threats are getting smarter.
Difference Between UEFI and Legacy BIOS
UEFI (Unified Extensible Firmware Interface) is a newer firmware that has mostly replaced Legacy BIOS. UEFI is better for bigger storage, faster boots, and more security like Secure Boot. Legacy BIOS has limits, like a small disk size and no security, but UEFI is more flexible and secure.
In short, knowing about Secure Boot and UEFI is key for your computer’s safety and performance. Understanding these helps you manage your system better, keeping it safe and efficient.
Why You Should Care About BIOS/UEFI Settings
Changing your BIOS/UEFI settings is easy and can make your system more secure and fit your needs better. These settings control how your computer works, affecting everything from how it boots up to its security features.
Enhancing Security
One key reason to tweak your BIOS/UEFI settings is to improve your system’s security. Enabling Secure Boot is a big step. It makes sure only approved software can run on your device, keeping out malware and unauthorized access.
To add more security, you can also:
- Set a BIOS/UEFI password to block unauthorized access to your system’s settings.
- Turn off devices or ports you don’t need to lower risks.
Boosting Performance
BIOS/UEFI settings can also help your system run better. For example, changing the boot order can make your system start up faster. This is because it boots from the right device first.
| Setting | Description | Benefit |
|---|---|---|
| Boot Order | Determines the order in which the system checks for bootable devices. | Faster startup times |
| Virtualization | Enables or disables virtualization support. | Improved performance for virtual machines |
| Fan Settings | Controls fan speeds for cooling. | Better system cooling and reduced noise |
Tailoring Your System to Your Needs
Lastly, BIOS/UEFI settings let you customize your system for your needs. Whether you’re a gamer, a pro, or just a casual user, you can tweak settings like CPU and memory configurations to boost performance for your main tasks.
By getting to know and adjusting these settings, you can make sure your system is running smoothly. This gives you a more efficient and personalized computing experience.
Accessing the BIOS/UEFI Menu
To start, you need to get into the BIOS/UEFI menu. This is the first step in tweaking your computer’s settings. The steps can differ based on who made your computer or motherboard.
Methods to Enter BIOS/UEFI Settings
There are two main ways to get into the BIOS/UEFI menu. You can press a specific key when your computer starts up. Or, you can use the Windows Advanced startup options.
- Pressing a specific key during startup: Common keys include Esc, F2, F10, or Delete. The exact key is usually displayed on the boot screen.
- Using Windows Advanced startup options: You can access the BIOS/UEFI menu through Windows Settings by going to Update & Security > Recovery, and then clicking on Restart now under Advanced startup.
Navigating the Menu
Once you’re in the BIOS/UEFI menu, you’ll use your keyboard to move around. The layout might change, but most modern UEFI firmware has a graphical interface.
Use the arrow keys to move through the sections and options. Some UEFI firmware may also let you use a mouse.
Using Keyboard Shortcuts
Keyboard shortcuts can make navigating the BIOS/UEFI menu faster. Here are some common ones:
- F5/F6 to change values.
- Enter to select an option.
- Esc to go back or exit a menu.
Knowing these shortcuts is key to quickly setting up your BIOS/UEFI settings.
Enabling Secure Boot
Secure Boot is a key way to protect your system. It makes sure your computer only boots with trusted software. This is set by the PC’s maker.
Steps to Enable Secure Boot
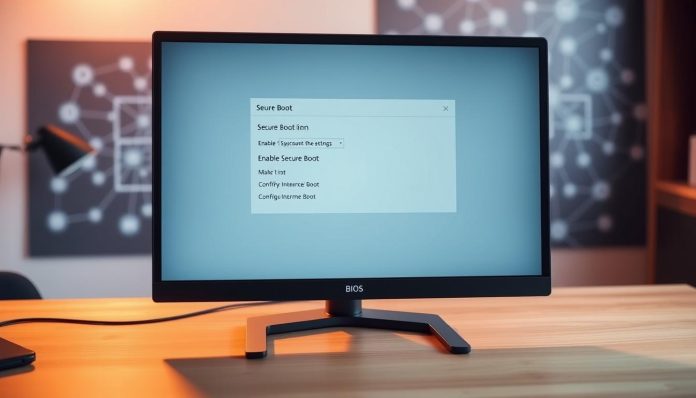
To turn on Secure Boot, first, get into your BIOS/UEFI settings. You’ll need to restart your computer and hit a key like F2, F12, or Del. Then, find the Secure Boot option in the BIOS/UEFI menu, usually under “Security” or “Boot”.
- Restart your computer and enter the BIOS/UEFI settings.
- Navigate to the Secure Boot option.
- Enable Secure Boot.
- Save your changes and exit the BIOS/UEFI settings.
Checking Secure Boot Status
After turning on Secure Boot, make sure it’s working right. You can check in your BIOS/UEFI settings or through your operating system.
Checking Secure Boot Status in Windows:
- Go to “System Information” or “msinfo32” in the Run dialog.
- Look for “Secure Boot State” under the “System Summary” section.

Troubleshooting Issues
If Secure Boot isn’t working, you might face some problems. These could be due to hardware or software issues. Common problems include:
- Incompatible operating systems or software.
- Outdated BIOS/UEFI firmware.
- Incorrect Secure Boot configuration.
To fix these, update your BIOS/UEFI firmware and check for system or software updates. If issues still exist, try resetting your BIOS/UEFI settings to their defaults.
Setting Boot Order Preferences
Knowing how to set your boot order is key for keeping your system safe and working well. The boot order tells your computer which device to start from first. This lets you choose your main operating system or recovery media.
Why Boot Order Matters
The boot order is important because it tells your computer where to look for a device to start from. If it’s not set right, your computer might start from the wrong device. This could lead to security problems or make it hard to get to your main operating system.
Security Risks: Starting from an unauthorized device can let malware or unauthorized access in. Putting your main operating system first in the boot order helps avoid this risk.
How to Change Boot Order
To change the boot order, you need to get into your BIOS/UEFI settings. Then, find the Boot Options or Boot Order section.
- Restart your computer and enter the BIOS/UEFI settings (usually by pressing F2, F12, or Del).
- Navigate to the Boot Options or Boot Order section.
- Use the provided keys (often +/- or F5/F6) to adjust the order of the devices listed.
- Save your changes and exit the BIOS/UEFI settings.
Safe Practices for Boot Order Configuration
When you’re setting up your boot order, it’s important to do it safely to avoid problems.
| Practice | Description |
|---|---|
| Prioritize your primary OS | Make sure your main operating system is first in the boot order. This stops unauthorized devices from starting. |
| Limit boot devices | Turn off or remove devices you don’t need. This lowers the risk of security issues. |
| Regularly review settings | Check your boot order often. This makes sure malware or other changes haven’t messed with it. |
By following these tips, you can manage your boot order well. This improves your system’s security and performance.
Updating BIOS/UEFI Firmware
Updating your BIOS/UEFI firmware is key to keeping your system safe and running well. Old firmware can make your system vulnerable to threats. It can also cause problems with new hardware or software.
Benefits of Keeping Firmware Up to Date
Updating your BIOS/UEFI firmware has many benefits. Here are a few:
- Enhanced Security: Updates patch known security holes, protecting your system.
- Improved Compatibility: New firmware works better with the latest hardware and software, making your system run smoothly.
- Better Performance: Updates can fix performance issues, making your computer more efficient.

How to Check for Updates
To find BIOS/UEFI firmware updates, follow these steps:
- Restart your computer and enter the BIOS/UEFI settings (usually by pressing F2, F12, or Del).
- Find the “Update” or “Advanced” section in the BIOS/UEFI menu.
- Check your current firmware version and compare it with the latest version on the manufacturer’s website.
Step-by-Step Update Process
Updating your BIOS/UEFI firmware requires careful steps:
| Step | Description | Precautions |
|---|---|---|
| 1. Identify Your Current Firmware | Check the version in your BIOS/UEFI settings. | Make sure you write down the version correctly. |
| 2. Download the Latest Update | Go to the manufacturer’s website and download the update. | Be careful of fake or malicious update files. |
| 3. Prepare a USB Drive | Format a USB drive to FAT32 and copy the update file to it. | Use a reliable USB drive to avoid data corruption. |
| 4. Update the Firmware | Restart your computer, enter the BIOS/UEFI settings, and follow the on-screen instructions to update. | Don’t interrupt the update process to avoid bricking your device. |
By following these steps and keeping your BIOS/UEFI firmware updated, you can greatly improve your system’s security and performance.
Configuring Virtualization Support
When you look at your BIOS/UEFI settings, you’ll find an option that boosts your computer use: virtualization. This feature lets you run many operating systems on one machine. It makes your system more efficient and secure.
What is Virtualization?
Virtualization lets you create virtual machines (VMs) on your computer. These VMs can run their own OS and apps, separate from your main machine’s OS. This gives you more flexibility and security, perfect for testing new software or running old apps.
Enabling Virtualization in BIOS/UEFI
To turn on virtualization, you need to get into your BIOS/UEFI settings. You’ll restart your computer, then enter the BIOS/UEFI menu. Look for the virtualization settings. The steps can differ based on your motherboard, so check your manual or online help.
Once you find the virtualization option, just turn it on and save. Your computer will now support virtual machines.
Benefits for Home Users
For home users, virtualization has many perks. It lets you run many operating systems at once, which is handy for different needs or preferences. It also boosts security by creating a safe space for testing apps.
By enabling virtualization, your system will work better and faster. This is because virtualization helps manage resources and cuts down on unnecessary work.
System Performance Options
Exploring your BIOS/UEFI settings can reveal many ways to boost your computer’s performance. These options let you tweak your system for better efficiency. This is great for gamers, professionals, or casual users.
Adjusting CPU Settings
Changing your CPU settings can greatly affect your system’s performance. You can overclock or underclock your CPU, adjust the CPU multiplier, and enable or disable Hyper-Threading. These tweaks can improve your system’s speed, but they can also raise the risk of overheating.
| CPU Setting | Description | Impact on Performance |
|---|---|---|
| Overclocking | Increasing CPU clock speed beyond manufacturer’s specifications | Can significantly boost performance but increases heat generation |
| Hyper-Threading | Allows a single CPU core to handle multiple threads | Improves multitasking capabilities |
| CPU Multiplier | Adjusts the CPU clock speed relative to the front-side bus speed | Affects overall CPU performance |
Configuring Memory Settings
Changing your memory settings can also improve your system’s performance. You can adjust the RAM timings, voltage, and frequency. This helps find the best balance between speed and stability.
- RAM Timings: Changing the CAS latency, RAS to CAS delay, and other timings can enhance memory performance.
- RAM Voltage: Higher voltage can improve stability at higher frequencies but also raises the risk of damage.
- RAM Frequency: Higher frequencies can increase performance, especially in memory-intensive applications.
Managing Power Options
Managing your system’s power options in BIOS/UEFI can help balance performance and energy use. You can adjust settings like power phase control, CPU power management, and fan settings. This helps achieve your desired balance.
By adjusting these system performance options, you can customize your computer to fit your needs. Whether you want maximum performance or the best energy efficiency, you can achieve it.
Setting a BIOS/UEFI Password
Setting a BIOS/UEFI password is a great way to protect your system. It adds an extra layer of security. This ensures that your computer’s basic settings are safe from unauthorized changes.
Why You Should Consider a Password
Having a BIOS/UEFI password is key to keeping your system safe. It stops others from changing your system’s settings or installing malware. It’s a strong defense against intruders.
Key benefits of setting a BIOS/UEFI password include:
- Enhanced security against unauthorized access
- Protection of your system’s configuration
- Prevention of malware installation through external devices
How to Set a Password
To set a BIOS/UEFI password, follow these steps:
- Enter your BIOS/UEFI settings by pressing the designated key during boot-up (common keys include F2, F12, or DEL).
- Navigate to the security settings section.
- Look for the option to set a supervisor or administrator password.
- Enter your desired password and confirm it.
- Save your changes and exit the BIOS/UEFI settings.
Best Practices for Password Security
To make your BIOS/UEFI password more effective, follow these best practices:
| Best Practice | Description | Benefit |
|---|---|---|
| Use a strong password | Combine letters, numbers, and special characters | Increased security |
| Avoid common passwords | Steer clear of easily guessable information | Reduced risk of unauthorized access |
| Regularly update your password | Change your password periodically | Enhanced security over time |
By setting a BIOS/UEFI password and following best practices, you boost your system’s security. This makes your computer safer from threats.
Configuring Boot Parameters
Understanding and customizing boot parameters can make your system more secure and efficient. Boot parameters control how your system boots and works. By tweaking these settings, you can make your system fit your needs better.
Understanding Boot Parameters
Boot parameters are key in setting up your system’s boot order and enabling features. They also control how your system interacts with hardware. These settings are found in the BIOS/UEFI and greatly affect your system’s performance and security.
Some common parameters include the boot order and settings for hardware features. For example, you can set the boot order or enable virtualization or USB ports.

Customizing Boot Parameters for Your Needs
To customize boot parameters, you need to access the BIOS/UEFI menu. There, you can change the boot order and enable or disable hardware features. You can also tweak other settings for better performance and security.
- Adjust the boot order to ensure your system boots from the desired device.
- Enable or disable specific hardware features, such as virtualization or USB ports, based on your requirements.
- Configure other boot-related settings to optimize your system’s performance and security.
By carefully adjusting boot parameters, you can boost your system’s security and performance. This ensures it meets your specific needs.
Managing Hardware Settings
To get the most out of your system, it’s key to know how to manage hardware settings through BIOS/UEFI. This means making smart choices about which devices to turn on or off. It also involves tweaking hardware settings to fit your needs.
Enabling/Disabling Devices
BIOS/UEFI settings let you turn devices on or off. This is handy for saving power, fixing problems, or changing your system for different tasks.
- Turn off unused devices to avoid conflicts and save power.
- Turn on needed devices so your operating system can use them.
Customizing Hardware Configuration
Customizing hardware settings lets you make your system just right for you. You might tweak settings for your CPU, memory, or peripherals.
| Hardware Component | BIOS/UEFI Setting | Effect |
|---|---|---|
| CPU | Overclocking | Increased performance |
| Memory | XMP Profile | Enhanced memory performance |
| Peripherals | Device Enable/Disable | Device management |
Importance of Proper Settings
Setting up your hardware right is key for top system performance and stability. Wrong settings can cause crashes or slow performance.
Best Practices:
- Check your BIOS/UEFI settings often to make sure they match your needs.
- Keep a record of any changes to help with troubleshooting.
Understanding Secure Boot Keys
To keep your system safe, it’s key to know about Secure Boot keys. Secure Boot makes sure your computer only runs trusted software. It uses Secure Boot keys to do this.
What Are Secure Boot Keys?
Secure Boot keys are digital signs that check software during boot. They’re part of a system that checks the bootloader, operating system, and other software. This ensures they’re genuine before they run.

How to Manage Secure Boot Keys
Managing Secure Boot keys involves a few steps. You can add new keys, delete old ones, and save or restore key databases. The steps depend on your computer or motherboard’s maker.
- Enrolling new keys: This means adding new digital certificates to your system’s Secure Boot database.
- Deleting existing keys: Removing keys that are no longer needed or trusted.
- Saving or restoring key databases: Backing up your Secure Boot keys and restoring them if needed.
Importance of Key Management
Good management of Secure Boot keys is vital for your system’s security. If not done right, it can cause boot failures or let harmful software in during boot.
| Key Management Action | Description | Importance |
|---|---|---|
| Enrolling New Keys | Adding new digital certificates to the Secure Boot database. | Allows new, trusted software to boot. |
| Deleting Existing Keys | Removing keys that are no longer needed or trusted. | Prevents potentially compromised software from booting. |
| Saving/Restoring Key Databases | Backing up Secure Boot keys and restoring them when necessary. | Ensures system recovery in case of key loss or corruption. |
By understanding and managing Secure Boot keys well, you boost your system’s security. This keeps it safe during the boot process.
Backing Up BIOS/UEFI Settings
Backing up BIOS/UEFI settings is often overlooked but crucial. It saves you from future headaches. Your BIOS/UEFI settings are key to your system’s stability and booting.
Importance of Backing Up Settings
Backing up your BIOS/UEFI settings is essential. It lets you quickly restore your system after a reset or update fails. It also lets you try different settings safely.
Key benefits of backing up your BIOS/UEFI settings include:
- Quick restoration of settings after a reset or update
- Ability to experiment with different configurations safely
- Reduced risk of system instability due to incorrect settings
How to Backup Your Configuration
Backing up BIOS/UEFI settings depends on your motherboard. Here’s a general guide:
- Enter your BIOS/UEFI settings by pressing the designated key during boot-up (commonly Del, F2, or F12).
- Look for an option to save or backup your settings. This might be under an “Advanced” tab or within a “Save & Exit” menu.
- Follow the on-screen instructions to save your configuration to a USB drive or other supported media.
It’s essential to consult your motherboard manual or manufacturer’s website for specific instructions, as the process can vary.
Restoring Settings When Needed
Restoring BIOS/UEFI settings is easy. Just enter the BIOS/UEFI settings and find the “Restore” or “Load” option. Choose your backed-up configuration file.
| Step | Description |
|---|---|
| 1 | Enter BIOS/UEFI settings |
| 2 | Locate the “Restore” or “Load” option |
| 3 | Select your backed-up configuration file |
| 4 | Save changes and exit |
By backing up your BIOS/UEFI settings, you protect your system. Regular backups save time and reduce stress.
Common BIOS/UEFI Myths Debunked
Many people have wrong ideas about BIOS/UEFI settings and Secure Boot. This is often because of old information or not knowing enough. It’s key to know the truth to make smart choices about your system.
Myths About Secure Boot
Secure Boot makes sure your computer only boots trusted software. But, many myths surround this feature.
- Myth: Secure Boot is completely safe and can’t be broken. Reality: Secure Boot boosts security a lot, but it’s not perfect. Smart malware can still get around it.
- Myth: Turning on Secure Boot will make your computer slow. Reality: It barely affects speed. The extra security is worth it.
Misconceptions on BIOS/UEFI Changes
Changing BIOS/UEFI settings might seem scary, but knowing the facts helps.
- Misconception: Changing BIOS/UEFI settings can ruin your computer. Reality: It’s true that wrong settings can cause problems. But, most modern BIOS/UEFI has safety features to avoid permanent damage.
- Misconception: You can’t go back to the original BIOS/UEFI settings. Reality: Most BIOS/UEFI lets you reset to default settings. This is a safety feature for trying new things.
By knowing the truth about these myths, you can set up your BIOS/UEFI settings and Secure Boot. This will make your computer safer and run better.
Final Tips for Home Users
Keeping your computer safe and running well is key at home. It’s important to check your BIOS/UEFI settings often. This helps keep your system secure and running smoothly.
Reviewing Your Configuration
Make it a habit to check your BIOS/UEFI settings regularly. This ensures your system is current and safe. Always check that Secure Boot is on and your boot order is right.
Staying Updated on Cybersecurity
Cybersecurity is always changing. Keep up with the latest security tips and threats. You can find helpful info on sites like Microsoft and Intel.
Exploring Additional Resources
Look for online forums, tutorials, and guides on BIOS/UEFI and security. This will help you stay ahead of threats and improve your system’s performance. Being proactive about computer security is crucial for protecting your digital world.

